First cuts on the 3018 PROVer
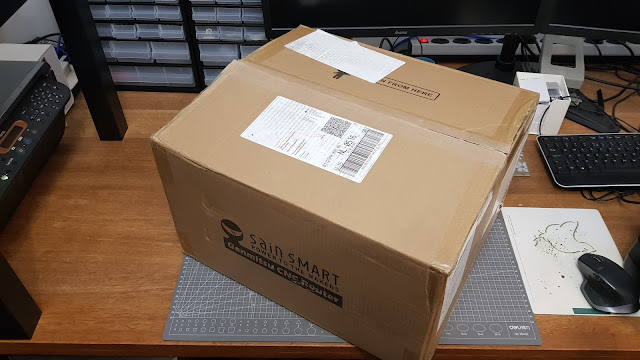
A few weeks ago, I received my brand new SainSmart Genmitsu 3018 PROVer CNC miling machine. Now it's time to make some noise! 😁
When milling through a piece of material, it is wise to have a sacrificial piece of material below it, so that the aluminium bed does not get milled away bit by bit. That's generally called a spoil board, or at least that's what I will call it.
I had some 18mm MDF laying around that is a little smaller (26x15cm) than the bed size (30x18cm), so I decided to use that at first. As I did, I noticed that that was also almost exactly the travel between end stops (263x155mm) that I had. Since I am not planning on removing the end stops (I kinda like that as a safety feature), thats the work area I am going to have to live wit. If my job gets close to that, I will also need to be very careful of where I place the material on the spoil board. I will have to check the travel in X and Y before committing the g-code.
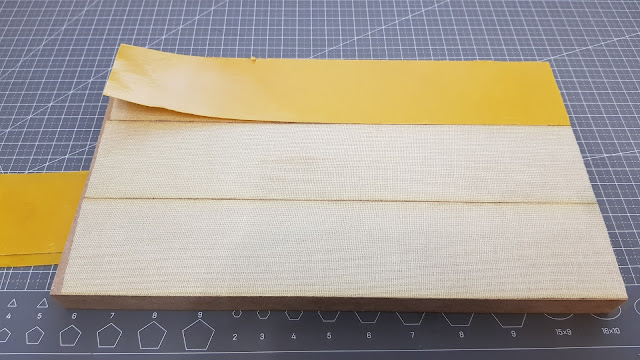
I also had a roll of double-sided carpet tape, so I decided to use that to attach the spoil board to the bed.
 |
| Spoil board with double-sided carpet tape |
An 18mm thick spoil board is very thick. Much more than needed. That will limit my Z travel (41mm between end stops. I measured with a tool sticking 15mm out of the collet that I could make that bit travel 26mm up from the surface of the spoil board, before hitting the Z+ endstop. That means that I can cut through material of 13mm thick max (the tool has to stick out the material thickness at least to do that, so max material thickness is half the remaining trave. If I want to cut rough thicker material, I will have to mill down my spoil board first 😂. We'll see when I hit that moment. Probably hardware stores are regularly open again by that time, and chances are that I have scored myself a 6mm MDF board already.
This is where I found out through dry-running X and Y above the surface, that I had to "Zero" my machine slightly left of the spoil board's bottom left corner in order to fully clear the board without hitting any end stops. Now let's see if this machine is powerful enough to make it plow through MDF...
It is not very clear from the picture above, but if you look closely, you can see that the bit does cut on the right hand side of the spoil board, but not on the left hand side. I got the opportunity to measure the difference (zero the bit on all four corners, calculate the difference), and it turned out o be only 0.3 mm off between diagonally opposite corners. I thought that was really OK! A sign of a good quality build.
 |
| Surfacing the spoil board. Taking off 0.2 mm top right, nothing bottom-left in this picture |
Despite the bit being a large diameter (1"is pretty large compared to the typically 1/8"bits for these machines), taking 0.2 mm max off at 200 mm/min and 10.00 rpm (which will probably be more like 8000 in practice, I'm told) worked out great for me. I only had to repeat the process once more, with a cut depth of 0.1 mm to get the entire surface flat. Also, there were no visible ridges between passes, so the Z-axis is neatly vertical (or at least perpendicular to the XY plane) as well! Very happy with that quality, straight out of the box 👌
As you can see from the little movie, surfacing MDF creates a lot of very fine dust. Now, MDF dust is not something you'd want to breathe in. So please be careful and wear a respirator. The SainSmart KABA Enclosure does a pretty amazing job of keeping the dust in, but it still is advised to wear breathing protective gear none the less, of course.
 |
| Oopsie moment |
Aaaaaannnnddd... there's my first *-up already! Almost done surfacing the first pass, the bit decided to plunge into the material, stopping the movement alltogether and burying the bit deeper into the spoilboard. All accompanied by the dying sound of the spindle and a bunch of vibration.
I quickly hit the panic button to stop all and kill the power. That is: the reset button in Candle
I think I did not tighten the collet nut enough, so the bit could dig itself into the material, now that it was "cutting" a substantial part of the circumference "outside" of the material. I ended up moving the Z up, tightening the collet a little stronger, re-zeroing off my freshly planed surface, re-zeroing just a little in the -X direction off the board (like I did previously), testing the X and Y limits of the cut, and after I was satisfied I would not trigger the limit switches, I re-sent de G-code. Finger on the reset button. So that took another 0.1 mm off the spoilboard, and probably 0.3 mm off the bit that was not surfaced yet. It removed the black surface of the burn mark of my oopsie, and continued on happily surfacing the entire board. The 0.3mm depth of cut bit did sound a little more like the machine had to work a bit too hard, but the surface came out nice and smooth. No ridges whatsoever! So next time I need to re-surface, I might just consider taking off 0.3mm per pass.
 |
| Dusty enclosure |
 |
| V-carving a grid |
So here's the final result of my minty new spoil board:
 |
| The final resulting spoil board |
I will be using my double-sided tape for now to attach work pieces to the spoil board. Spoiler: it comes off clean from the spoil board, so that's a big plus 😃
Of course there are plusses and minusses to using duble sided tape with regards to mechanical clamping or
Double-sided carpet tape:
+ Available (to me, at the time of first assembly of the machine)
+ Easy
+ No clamps to mess with or bump into
- less secure
- "gummy" consistency when cutting through material; gunks up the bit and can tear loose smaller parts
- possibility of glue residue when removed (not seen on MDF or wood yet)
The masking tape and super glue trick works at least as well, for as far as hold down goes. That then has the benefit of not being "gummy"when cutting through, and it peels off without any glue residue. So think I probably will switch to that method when my carpet tape runs out
Below are some (affiliate) links to ll the things that I purchased so far. I find it to be a good mix of everything, without spending too much money at once.
Once I am comfortable with the operation of the machine, and I find that I am doing most of my work in a certain area (engraving, PCBs, V-carving, general milling, ...) I'll probably invest in more quality bits (like form Toolstoday) for that specialisation, because I do not expect these bits to last very long. They will probably either snap, or they wil go dull pretty soon under my abuse 😁
SainSmart Genmitsu 3018 PROVer, directly from SainSmart
SainSmart Genmitsu KABA enclosure, also directly from SainSmart
Collet set 1-7mm + 1/8" + 1/4": Collets
Various bits set: Various Bits from Banggood
60 degree V-bit: V-bit from Banggood
PCB drill bits: PCB drill bit set from GearBest


Comments
Post a Comment