In preparation for the arrival of my 3018 CNC machine (there will be more posts on that soon), I already received the enclosure it is going to reside in. I decided not to build one from scrap, but buy the original SainSmart one instead. With the current lockdown measures in place, I did not want to go the route of ordering at the local harware store, then go and collect it, then realise I needed more, and repeat the process. Not if I can buy a complete product for less than €100.
Having built the enclosure, and even having assembled my CNC machine already, I can say that I was very happy with my choice 😁
This is a picture review of the unboxing and assembly fo the Genmitsu KABA Desktop CNC Enclosure by SainSmart.
 |
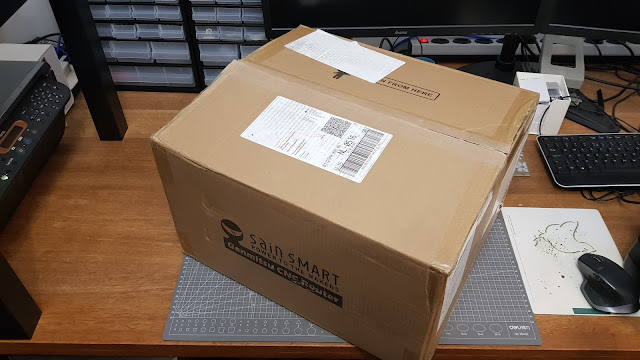
| The box as it arrived |
 |
| First impression: lots of foam. And an instruction manual. |
 |
| The first Acrylic plates |
 |
| And below that, more Acrylic plates |
 |
| Next layer: Handle, Hinges, Magnetic Tape, Corner pieces, various 20x20 profiles, and some profile cover strips |
 |
| Laid out on the table. There's a good and easy assembly instruction |
 |
| Two long profiles, two shorter profiles, and 4 corner pieces to start with |
 |
| It's easiest to mount the corner pieces "upside down" at first, ... |
 |
... and flip the frame over when done
|
 |
| The shortest 4 profiles are for the sides |
 |
| Trying to make everything as square as possible, although it does not matter as much for the enclosure as it does for the machine itself |
 |
| So now we have a cubic frame of 20x20 profiles |
 |
| Time to add some Acrylic. screw on the T-nuts only one or two threads, and orient them rougly aligned with the profile they are goint to sit in |
 |
| First Acrylic (side) panel about to go on... |
 |
| It is easiest to peel off the corners of the protective paper from all Acrylic plates first. Especially if you want to handle the Acrylic plates with gloves like I did. That prevents fingerprints and smudges, which is of course not necessary for a CNC enclosure, but it does make for nicer pictures 😉 |
 |
| Meanwhile, I also assembled an IKEA LACK table the machine and enclosure get to sit on eventually |
 |
| OK, front panel is positioned upside down, but what I wanted to show in this picture is the top plate. It is split in two pieces the get hinged together. That means either the front or the back halve can hinge upwards. Tha manual is not very specific about that, but I opted to heve the rear bit hing upward. That way, I can access the control board from above. |
 |
| Tha manual says to put the hinges 74.5mm in from the sides. Tha actual dimension is not that importan, but it looks best when both hinges are equal amounts in. So I made a "template"(a piece of paper with a certain width) to reference off the side of the panel. Easy! |
 |
| So there it is, hinging up the rear top panel. The rear panel has an opening. I put that opening at the top, near the control board. The opening is to feed the power (and USB) cable through. The opening can also be near the bottom if that suits your cable routing better. It's just a thing to look out for when you start putting in the T-nuts in the rear plate. |
 |
| The hinged part has one T-nut to "lock" it. I found that I did not need to lock it, so I ended up letting it just sit closed by gravity. |
 |
| The covering strips are cut at an angle, which works good at one end, but not at the other end. I had to remove some small pieces of plastic sticking out to the sides at that end. A simple snip with some sharp cutting pliers did the trick. No biggie tot repair, but without it, the covering strip would not go into the profile's slot |
 |
| The covering strips provide a solid base around the front of the enclosure for the next step: |
 |
| Cutting and sticking on the self-adhesive magnetic strip |
 |
| It simply needs to go all around the frame on the front side |
 |
| ... and all around the front Acrylic panel |
 |
| Then it's time to install the handle |
 |
| This is the orientation of the parts that you need. The panual is not very clear on that, but there's only one way it will fit AND clamp the handle to the panel, so you'll figure it out too (or you peek at my picture 😉) |
 |
| And then, sudenly, it's all done! |
 |
| Completed, and in position on it's dedicated table. Awaiting the arrival of the CNC machine... |
Get yours here :)


Comments
Post a Comment